The method of rooting the Android device depends on the device you are using, you can not root all Android smartphones and tablet devices the same way. I’ll tell you how to root any android device with the computer. If you have never rooted any Android, then I recommend to you to know more about Android rooting from the Web, it kills phone warranty and erases data from your device.
One click Android rooting software are not free for you, as you think, the software can ask you to purchase paid features. The manual method written below will be a bit longer but you do not have to spend money.
Follow the steps written below:
Step 1. Backup your device
The process of going to the root an Android device will format all data, including photos, apps and contacts from the device, so the first thing you have to do is to backup your Android smartphone or tablet device and then start the rooting process. Contacts are automatically synchronized to the server, photos are backed up online with the Google Photos app, upload important documents in the Drive storage, and after that you have some important stuff, just copy it on your computer, or any external storage.

Step 2. Unlock Bootloader and Install Custom Recovery
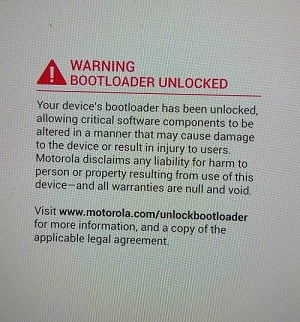
Unlocking bootloader is the first step for Android rooting, you can unlock the bootloader of your Android smartphone or tablet device using your computer. The way to unlock the Android bootloader varies according to the device, so to unlock it, you will need to visit your device vendor’s official support website, or sites like XDA-Developers.

Many Android phone vendors offer official support to unlock bootloader, some of the following are the following:
After unlocking the bootloader, you will need to flash the custom recovery image on your device. TWRP and ClockworkMod are currently the best Android custom recovery, you can download the Flash file from the official website or XDA-Developers site to your device.

Step 3. Whether to install custom firmware
After unlocking your Android, you can install and use a custom firmware on your device. There are many good custom Android firmware / ROMs available in the market, one that is very popular is LineageOS. Android custom ROMs come with many features, run on the latest Android version with regular updates, and there are many other tools available to you.

If you are satisfied with your phone’s stock firmware, skip this step, otherwise download the custom firmware and copy it to your Android internal storage and then flash it via custom recovery.
Step 4. Install Magisk or SuperSU
Magisk and SuperSU handle the root access permissions on your Android device, so that you can give super user requests to root apps, and say your device is rooted. Magisk is a very good solution compared to SuperSU, it is open-source and allows you to use applications on your device which does not work on rooted devices.

I advise you to install Magisk on your Android device. Download the Magisk flash file and copy it to your mobile device, reboot to custom recovery and then just install the flash file.
Step 5. Check that your device is rooted
After everything is complete, just reboot your device and wait for the welcome screen. The first boot may take time, so please wait until it is complete.
Set up your device for use first, add a Google account and go to the Play Store. Install and open the root checker app (e.g., Root Checker), provide a superuser request and verify that your device is rooted.

[custom-twitter-feeds feed=2]


